Dental implants attach directly to the jawbone to support a crown, bridge, or denture. The implant post functions like a root, which helps the replacement tooth feel secure during chewing and speaking. Since the implant stays fixed in place, it avoids many of the limitations associated with removable dentures, including dietary restrictions. The direct connection to the bone also helps reduce bone loss and maintain jaw structure over time.
The natural look of implant-supported restorations comes from customizing the crown or prosthetic to match surrounding teeth. This design makes the final result blend with nearby teeth and feel comfortable during everyday activities. Because the implant provides a firm anchor, the restoration can function similarly to a natural tooth and fit seamlessly into the patient’s bite. Here is more information about the process of getting dental implants:
Step 1: Initial Consultation and Planning
The process begins with a consultation that includes a full assessment of the jaw and surrounding structures. Imaging helps determine whether the bone can support dental implants and identifies the best placement site. This evaluation also checks for any conditions—such as inadequate bone density—that might require preparatory steps before moving forward.
Planning includes selecting the appropriate restoration type based on how many teeth are missing. A single crown, a multi-tooth bridge, or a denture each requires a different number of implants and a specific placement strategy.
Step 2: Preparatory Procedures
Some patients need preparatory procedures to create a stronger foundation for the implant. When bone density is low, bone grafting may support the implant during healing. In other cases, damaged teeth may need to be removed before implant placement can begin. Once the area heals and the bone reaches the proper condition, the patient moves to the surgical placement stage.
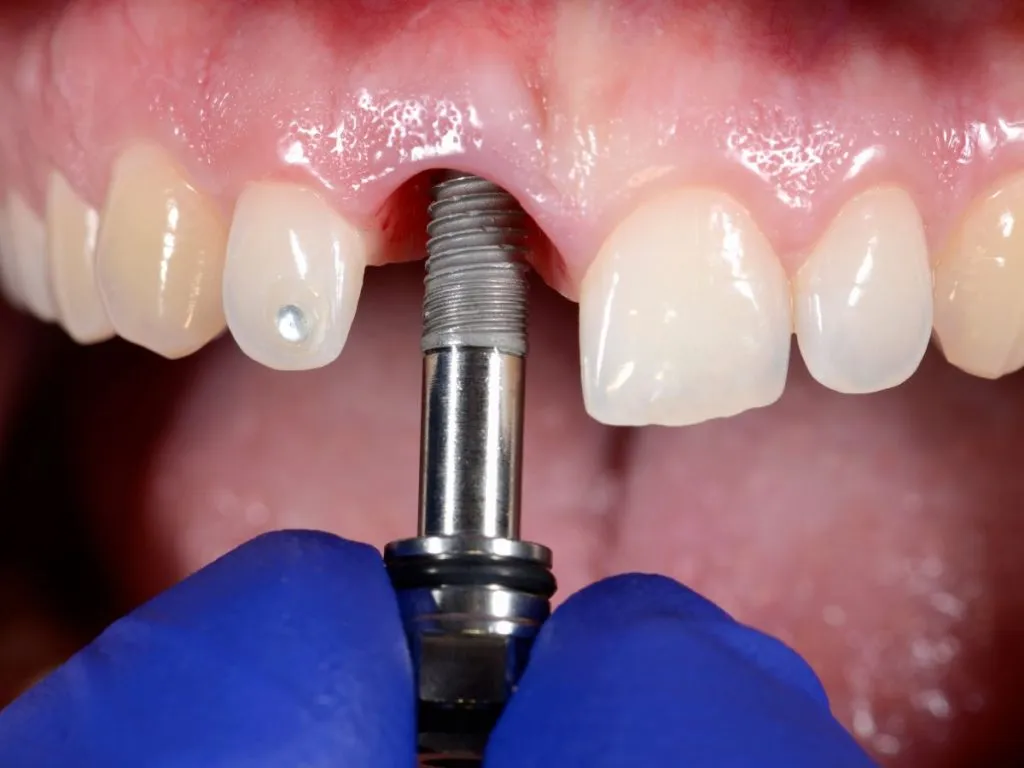
Step 3: Implant Placement
During placement, the dentist opens the gum to place the implant into the jawbone at the planned angle and depth. After the dentist positions the implant, they close the gum tissue to protect the area while healing begins. The appointment is typically straightforward, and a temporary restoration may be added depending on the location and stability of the implant.
The exact number of implants placed depends on the treatment plan. Single implants replace individual teeth, while multiple implants can support a dental bridge or a denture.
Step 4: Healing and Osseointegration
Healing begins as the implant bonds with the surrounding bone in a process known as osseointegration. This connection helps the implant stay secure and allows it to handle the pressure of daily biting and chewing. During this period, the gum and bone gradually adjust around the implant. If a temporary restoration was placed, patients can continue normal activities while the area heals.
Step 5: Abutment and Final Restoration
When the implant is fused to the jaw, the dentist attaches an abutment to create a connection point for the final restoration. The abutment extends above the gumline and supports the crown, bridge, or denture. After the abutment is in place, impressions or digital scans are taken to craft a custom restoration that matches the shape and shade of the surrounding teeth.
The final restoration is then attached, completing the tooth replacement. At this stage, the implant functions much like a natural tooth and is designed to handle daily chewing with no dietary restrictions.
Learn More About Getting Dental Implants
Each stage of the dental implant process, from planning to placement and final restoration, contributes to a stable and natural-looking result. If you are exploring tooth replacement options, consult your dental provider to see if an implant may fit your needs. Implants can support various types of restorations, providing stability that can last for years.